
HOW TO MEASURE YOUR OWN HOUSE
If you can measure you own house effectively, you can save time and prevent the spread of virus through social distancing.
1. Don’t Worry
Don’t worry about using rulers and graph paper. Just use a sharpie marker for the walls and a pen for writing the measurements. The drawing doesn’t have to be perfect (the measurements just need to be legible).
2. sketch the perimeter
Go outside, get some fresh air, and start by drawing each exterior wall around the perimeter of your house for the ground floor. Just leave an empty space for doors or windows. Sometimes as you travel around the house and return to where you started, your sketch won’t match up. No problem. Just use that mess-up as a guide to re-draw it on a new paper.

Use a thick marker for this step if you have one.
3. sketch Interior walls
Now that you have your exterior walls drawn, you can go inside and start drawing the interior walls within that perimeter. The openings for windows and doors will be a great guide to help you figure out where to draw those interior walls. It may be helpful to start in pencil, and then darken it in later with a marker once you’re done. Using a thin pen, it is also helpful to draw in counters, sinks, toilets, appliances, steps, electrical panels, and any other fixed items, but you do not necessarily need to measure those things.

Draw the interior walls, toilets, sinks, counters, faucets, and appliances.
4. measure
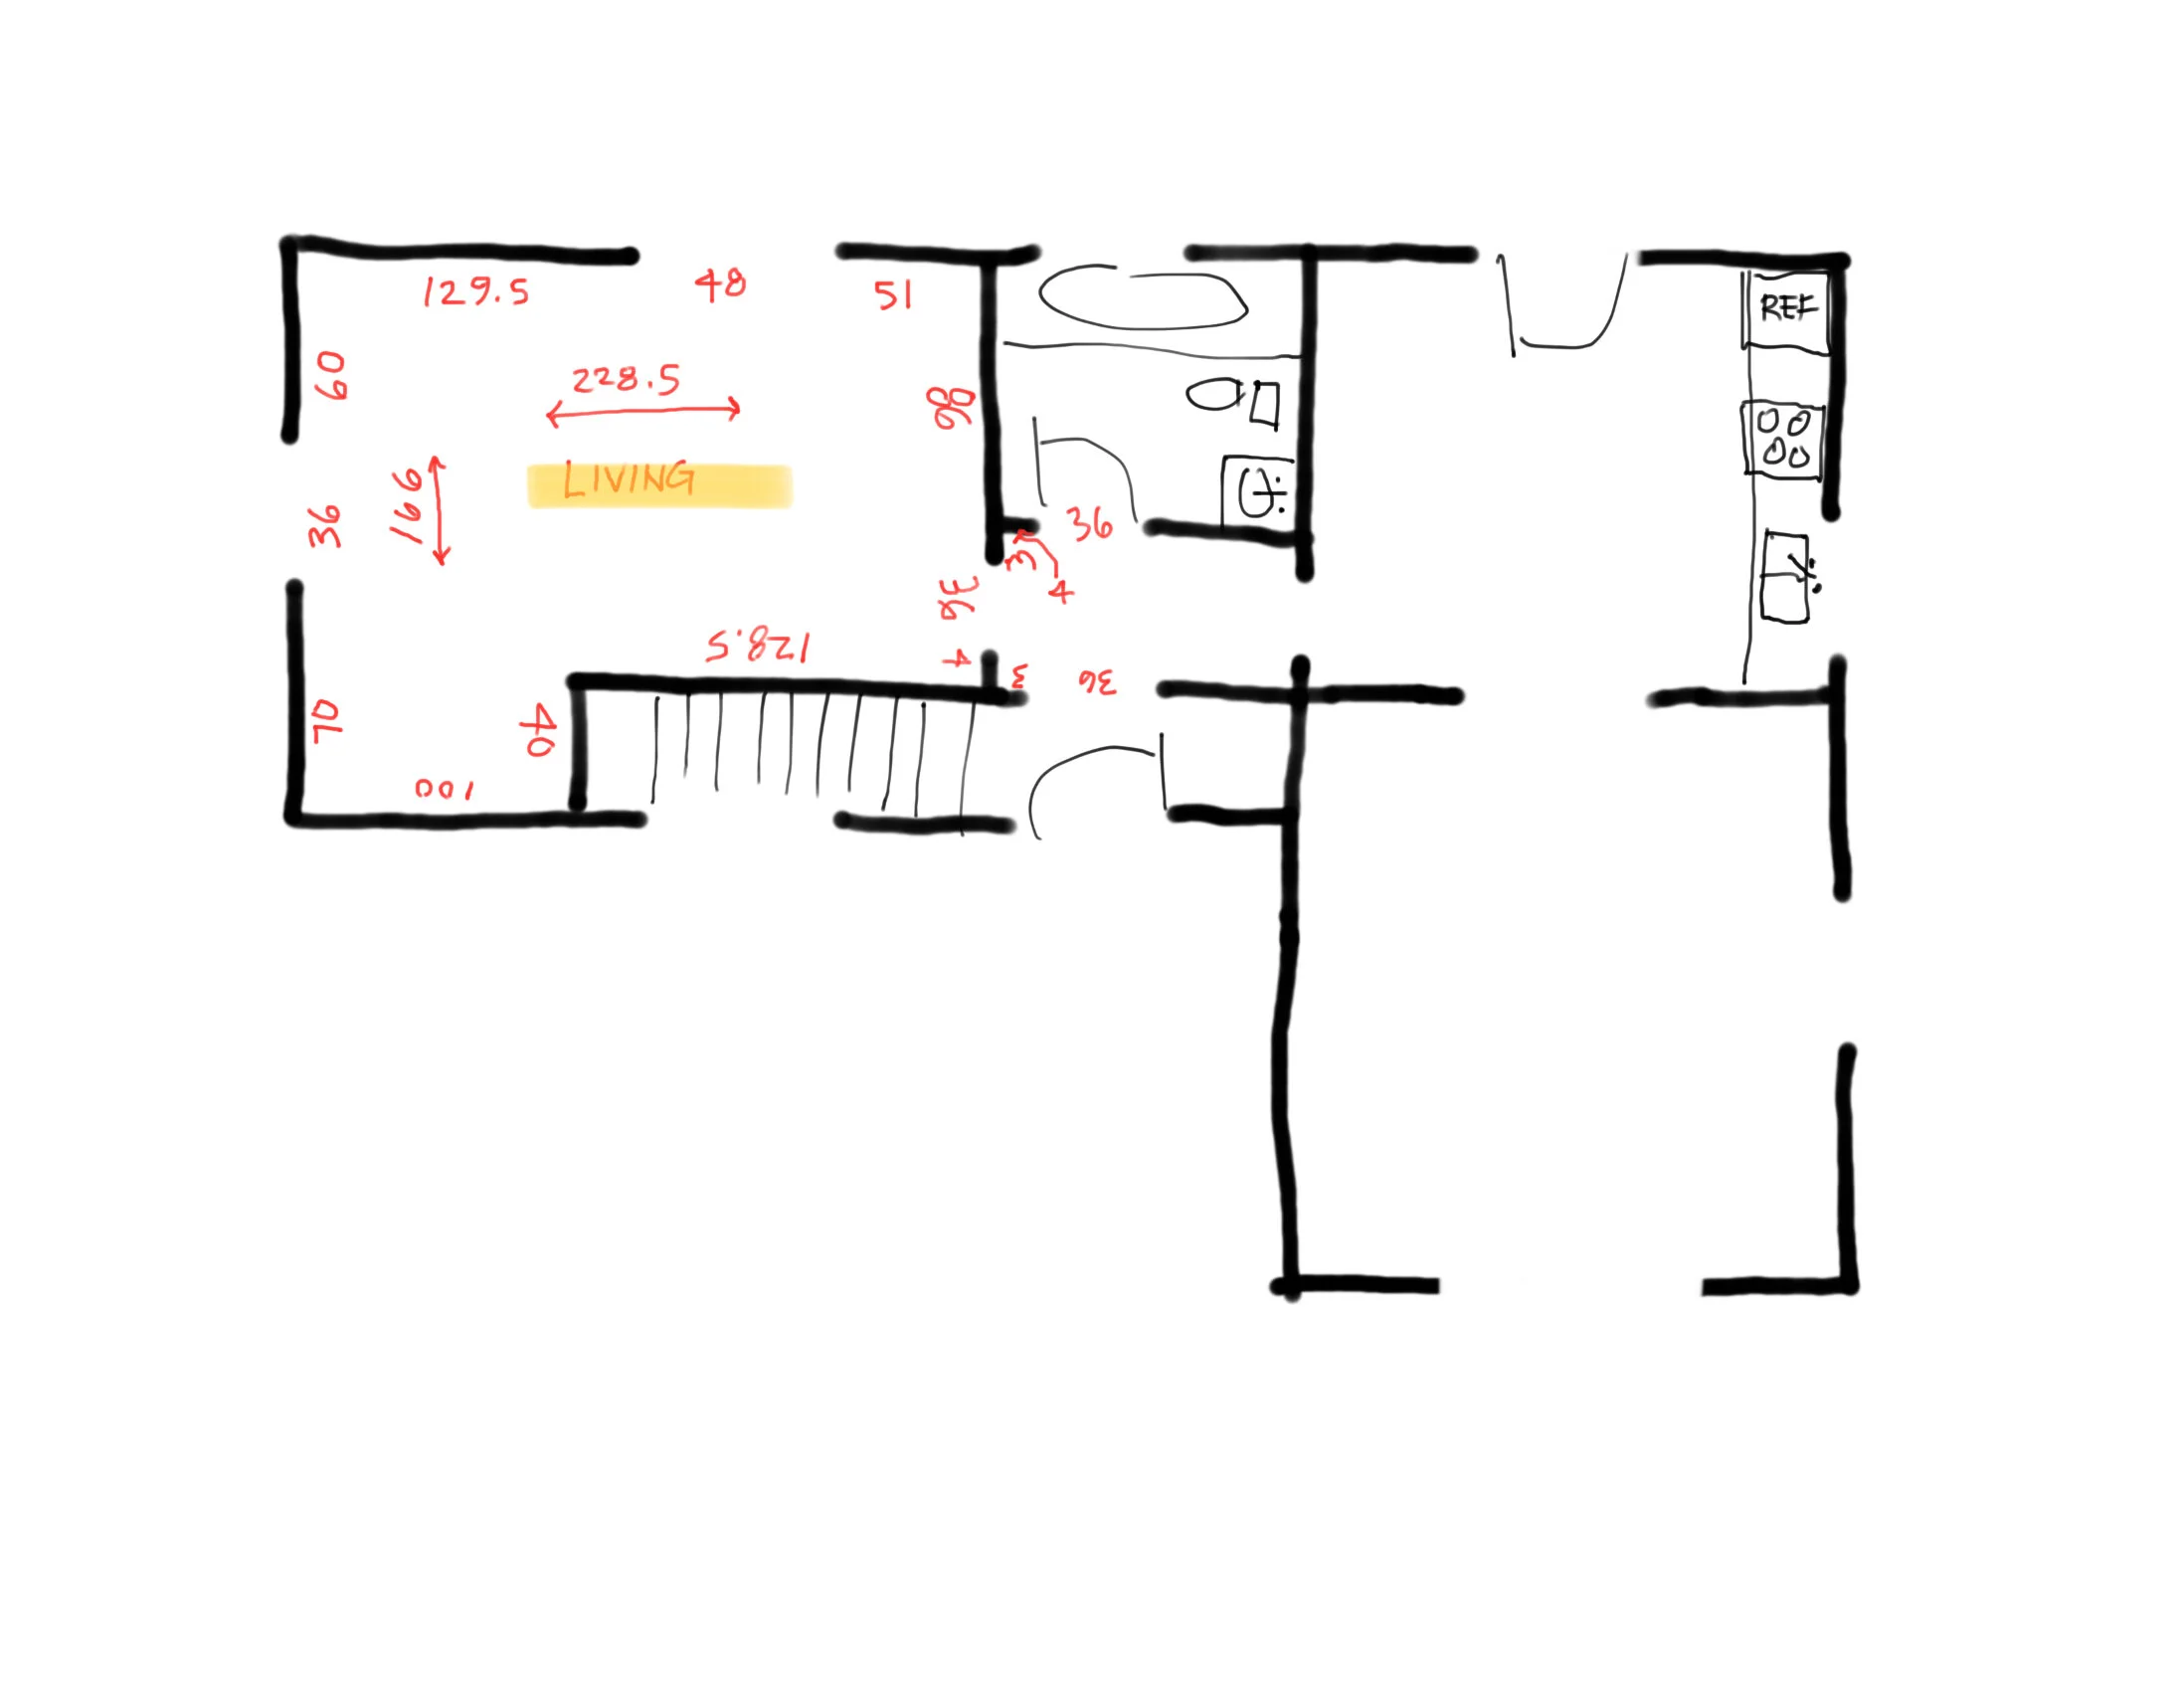
Now it’s time to measure each wall, door, and window. We usually measure to the nearest half of an inch, and we write down all measurements in inches only. We don’t write feet and inches since that can get confusing. Inches-only keeps it consistent. When you write a measurement next to a wall, door, or window, rotate the paper, so you are facing that wall and write the measurement in that same orientation. This helps us to know which number relates to which wall, and it also helps 6’s not look like 9’s since we know you were facing the wall when you wrote the number. When you’re done, the paper will have numbers written sideways, upside down, and right side up. When you measure a door, don’t measure the door frame or trim. Just measure the size of the actual door panel. When you measure a window, don’t measure the trim. Just measure the actual window “product”. Don’t measure to the glass. Find the frame of the window. Sometimes the window frame will be concealed behind window trim or drywall, but just do your best. We will take more accurate measurements if it is really needed in any certain areas.

Preferably with a different color, write in the length of each wall, door, and window (with the numbers facing each item as shown above)
5. overall dimensions
Once you have finished measuring a room, measure the overall length and width. Write those two numbers in the middle of the room, and underline them with a double sided arrow pointing in the direction it measures.

Write in the length and width of each room with an arrow as shown
6. Room Names
Add a room name to each room. That’s it! Easy.
Add a room name
7. ceiling heights
Measure the floor-to-ceiling height, write it under the room name, and circle that number.

Write in the floor-to-ceiling height
8. Window/door heights
Measure the height of the window sill above the floor. Put your tape measure on the floor, and measure to the top surface of the window sill. While facing the window with your paper, write an “S:” above the window opening with the measurement, like S: 24. Do the same for the window head, like H: 36, for example. To measure the window head, place your tape measure on the window sill, and measure up to the top of the window frame (not the glass and not the trim). *HINT: the tops of windows and doors usually align with each other.

Write in the window sill height above floor, window head height above sill, and door head height above floor
9. Repeat
Repeat this for all rooms on all levels.
10. basements/crawlspaces
In the basement, especially unfinished basements, there may be columns and beams exposed. We need to document the size (such as 4x4) and location of those. We also need to measure the height and the spacing of the floor joists above (if exposed). Like 2x10’s spaced 16” on center, for example. *HINT: when you refer to beams, the first number is the width and the second number is the depth from top to bottom, so a 2x10 is 2” wide and 10 deep (well, actually a 2x10 is 1.5x9.25, but that’s a lesson for a different time).

Dash in the beam above, draw in the joists above, and label their size/spacing
11. Exterior heights
Now we need to go outside to measure the heights of things. This will be the tricky part. You will need to do your best to draw the shape of the house from ground to the roof. The goal here is to see how high the main floor is above the ground. This will vary on each side of the house, but if you give us a measurement at each exterior door, that should be good.

Draw the profile of the house on the exterior from ground to roof and include each floor
12. Roof Fascia
Also we need a measurement from the main floor up to the underside of the roof overhang where the gutter is located. This board that the gutter is attached to is called a fascia (pronounced fay-sha). We also need a measurement of the height of the fascia.

Add dimensions (inches only) for the height and overhang of each item
13. Roof overhang
The underside of the roof overhang is called a soffit. We need to know how far the roof overhangs on each side of the house. (see example image above on step 12)
14. Roof slope
For the roof, it is very helpful if we can get the roof slope. Usually the compass app on your phone will measure angles. There’s also free phone apps like “Pitch Factor” that can give you roof slope. Rather than climbing up on the roof, you can determine the slope by holding your phone against a sloped ceiling or a sloped rafter board in your attic. (see example image above on step 12)
15. Roof rafters
While you’re in your attic, you might as well measure the size of the rafters or trusses and also their spacing, like 2x6’s at 24” on center, for example. This can be documented similar to how you did your basement ceiling. (see example image above on step 10)
16. decks
If you have any decks, please measure the size of those in a similar fashion, and also add a measurement to show how far they are from some point (like a corner or window) on the house.

Draw/label any porches, decks, walkways, etc.
17. Garage/Shed
If you have a detached garage or shed, we will also need to know the sizes of those, and how far they are from the house.

Draw and label any other structures like sheds and garage and measure their distance from the house
18. House Photos
Lastly, take photos of each room, the basement, crawlspace, attics, and each side of the house. It is most helpful if the photos on the exterior show the entire house and not just a small part of it, and ensure interior photos show enough context that we can figure out which room it is (a photo zoomed in too close of a blank wall is not helpful because it could be any room, but a wall with a window or door will give us a clue to know which room the photo is taken in… it’s best to stand as far back as possible to get the whole room in the photo).
19. Photos of sketches
Take photos of your sketches. It’s best to put the paper on the ground outside, so you get good light and avoid shadows from your hand in the photo. You can focus your phone camera by tapping on the center of the screen before you take the photo.
20. Email
Combine all the photos into an email and send over to us. If you know how to combine all of it into one PDF file, that would be ideal.

You might be able to select all the photo files, right click, and combine as a PDF file. OR, you might be able to right click and print them as a PDF (select a printer name such as “adobe PDF” or “print to PDF” or something like that). It’s just helpful if you don’t need to send 20 separate emails.
21. Relax
Phew. Take a break. Have a coffee or adult beverage. Nice work. If we need anything else, we will let you know.

Relax and let us take it from here :)